MonsterStone: Prelude (Early Alpha)
Ruins terrain feature and more forest levels!
Last week, I made a post on what I expect going into 2023, and I talked about how I need to create a ton of levels for my game Monsterstone: Prelude.
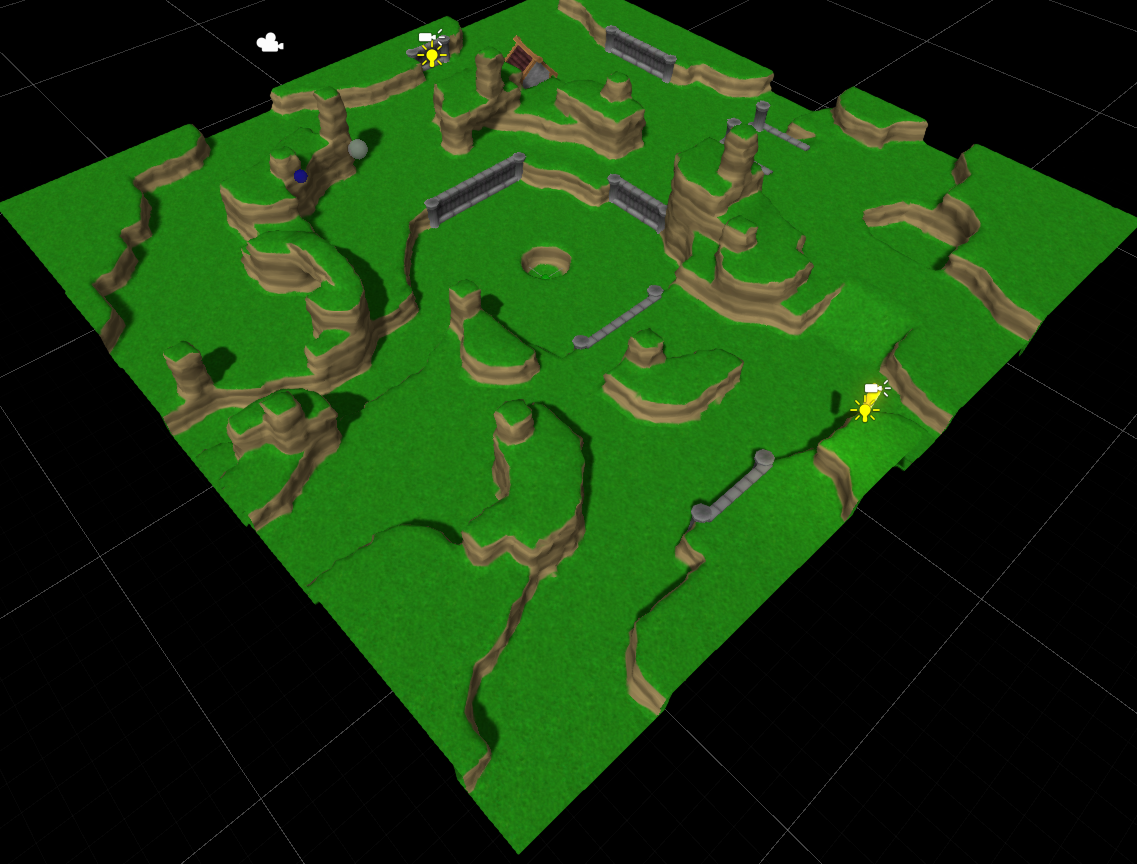
I also mentioned I might provide some context as to how the levels are actually made, and I had the idea this morning to just show instead of tell. Therefore I plan to do a livestream next Saturday, 28. Jan. where I will be making the terrain for a new level from scratch, and trying to implement most of the available features. So if you are curious, why not come say hi at https://www.twitch.tv/dragonking2504 . I will aim at starting the stream around 13:00 UTC+1. I am also considering putting up a Blender template for making the terrain, in case anyone wants to try it out for themselves. Over the previous week, I managed to make the terrain for almost 3 new levels, as I ran into some issues Friday that ended up taking away valuable time, so let’s talk about that!
How I implement man-made ruins as a terrain feature. One of the terrain features I can add is what I call “ruins”, which are simply man-made structural segments composed of walls and pillars and canals. Combine them with the terrain itself, and I can make the site of a city or simply use it to embellish parts of the terrain and hint at an old site of human activity. Back in 2018, I made a post about it, when I had just finished most of the work on my tileset. It only uses a small handful of textures, but allows for a lot of diverse shapes and angles. I have what I call a “master” Blender file, where each segment permutation exists, and I just copy-paste the ones I need for my terrain directly into the terrain Blend file. Through simple grid-snapping using the default Blender units, I can quickly stitch together some very dynamic shapes. Once I am happy with the layout, I can also merge the individual pieces, select the whole mesh, and merge vertices by distance. This usually gets rid of a ton of unnecessary vertices, and should also optimise CPU render performance a lot.
In order to combine all the pieces, it does mean that each wall segment needs to line up perfectly, which in some extreme cases require ultra specific permutations that act sort of like “adaptors”. In a dynamic game setting where players can build stuff on their own, this variety would never work, as you would need to account for a ton of different edge cases (no pun intended), which is why we normally don’t see shapes such as curved wall pieces. In a modelling use-case, you can argue that you have a lot more freedom though, especially when these walls are made specific to the level. To cut down on development time, I would still argue that it makes sense to settle on a more generalised set of build pieces that cover the most frequent use-cases. Otherwise, like in my case, I could easily end up spending way too much time on just 1 design of these wall pieces. Imagine if I wanted more variety, by introducing different designs, but still keeping the different permutations available?
On top of those design constraints, you might also stumble into other annoying hurdles along the way. For instance, when you “ctrl+c” -> “ctrl+v” a model from one Blend file to another, your copied model will also make a copy of its material and assign it. From what I understand, it is because the copy is temporarily stored before you paste in a copy, so to achieve that, Blender will also need to store a copy of the material data, not just mesh data. This is why you should use “shift+d” to duplicate, instead of copying. The issue is that you can’t easily do that across different Blend files, which is what I need. You can “append” the mesh data from within the target Blend file, but that brings to light another problem. In this way, you need to properly name every single mesh something sensible, since you only get a list of the mesh names, where you have to find the one you are looking for. Going back to the sheer amount of different shapes, and you find yourself scratching your head as to how you would logically name each piece.
This was the reason I did not finish the terrain during Friday. I had never bothered naming anything, so each piece was just named “plane_XX” with close to 100 different meshes. Not only do I have a ton of pieces because I account for straight, 45 degree and 22.5 degree angles, but I also have a Top and Bottom piece for each. The bottom pieces can be stacked vertically to allow for seamless continuous verticality. For simple pieces, the naming convention is rather simple, such as: “ruins_wall_straight_top” and “ruins_wall_straight_bottom”. Some of the most extreme edge-case pieces have really convoluted names though, such as: “ruins_wall_corner_diagonal_slanted_long_outer_up_left_bottom” and “ruins_wall_corner_diagonal_slanted_long_outer_down_right_bottom”
After all, each piece also needs a unique name that also describes their use-case, direction, angles, connection “adaptors” and so on. It took a little over an hour to rename everything, and I also had to make sure to name both the model, and the mesh data, just to make things even more tedious, haha. When appending, you go by mesh data name, but in the model overview, it goes by model name, so you kinda want to keep everything as consistent as possible. I also ran into an issue with the level I was working on, where the particular combination of walls I wanted did not have any appropriate permutations, so I also had to spend time making more wall segment adaptors. I also used this opportunity to clean up some material data, and make the whole master file more “tidy”.
After this exercise, I decided I would probably just continue to copy and paste across the Blend files, and just re-assign the shared material in the target file. Using the append feature is not really feasible when each mesh has such convoluted names, I would end up getting the wrong piece and have to look for the right one in the master file anyway. The time spent doing all that is more than having to fix the material data. I can always duplicate pieces in the target Blend file anyway, I just have to remember to fix the material data before doing so.
I have considered other approaches than this, but so far, my conclusion is that this is the best for what I am trying to achieve. For instance, I could have made placeable prefabs for each wall piece permutation within Unity, and then built those parts of the terrain in the game engine. The issues are multifold though. For one, I would lose out on performance without using a mesh combiner, and even that might be less performant, as I am unsure if I could have it merge vertices that are “doubled”, aka. On top of each other. I would also not be able to adjust the organic terrain to match the wall segment easily, as I would have to imagine where vertices would have to go, or make a more generalised solution in my terrain “sculpting” process.
Another solution would have been to just make overlapping pieces, but that would come at a significant cost to performance and/or fidelity. You might need to dedicate more texture space for the extra generalised surface, though you could re-use parts of it at the cost of visual fidelity. You would still need a lot of excess geometry though, which would put a larger strain on both CPU and GPU, as there would be multiple times more mesh data to process.
Because all my wall segments are merged together, it also has a huge impact on how light affects the surfaces. You don’t have to account for gaps in geometry, or weird lighting because meshes are clipping halfway into each other. Some modern games take up extra performance in order to mask up this kind of geometry with various post processing effects. Overall, I am pretty happy with my current pipeline for this part of my level design. If I wanted to, I can always use what I have already made as a template for new pieces with different designs. The biggest benefit is that I have included optimization of level terrain, which means I won't have to use any wacky mesh baking processes in later stages of development, as I addressed that during the creation process. This means less work to do, and less room for making future errors. I hope you enjoyed this insight into how much work it sometimes takes to make even the simplest looking things. I personally prefer to dabble around a bit to figure out how to tackle issues such as performance for something like this, as it can help establish some ground rules you should adhere to, but also so your creative work does not go to waste. Once a 3D model is shaped, UV unwrapped and ready for use, it is difficult to go back and tweak the dimensions without warping the textures and so on, without having to redo the texture work. The last thing you would want to do is having to redo all your hard work because you did not establish your design specifications.

Leave a comment
Log in with itch.io to leave a comment.